- Sampler & vocoder
- Adding samples via Wooveconnect
- Levels, VU Metering & monitoring
- Sampling sounds from the audio input
- Skip-back sampling (resampling)
- Vocoder
- Working with slices
- Auto-slicing
- Real-time pitch and time warping
- Amen chop tutorial
- Multi-sampled instruments and percussion
- Using the two sample banks
- Using samples and kits in your songs
- Using single-cycle AKWF samples
- Using Amiga Tracker samples
- Using Teenage Engineering OP-1 / OP-Z sample kits
- Kit and/or master sample initialization
- Backing up sample kits
- Auto-space reclaimer
- Limitations
- Sampler & vocoder
- Amen chop tutorial
Example; slicing up the Amen break
The Amen break is a seminal six-second drum solo that originated from the song "Amen, Brother" by the 1960s funk and soul group The Winstons. This iconic drum pattern, played by Gregory Coleman, has left an indelible mark on music history, particularly within the realms of electronic music, hip-hop, and jungle.
Renowned for its distinctive rhythmic pattern and energetic feel, the Amen break has been sampled, looped, and manipulated countless times since its emergence in the late 1960s, becoming one of the most sampled drum breaks in music history. Its influence extends far and wide, shaping the sound of genres and inspiring generations of musicians and producers around the world.
The Amen break, as well as other iconic breaks can be found in this sample pack by OaSyntax on Freesound.org. For this short tutorial, we are using the 170_amen_A_.wav sample. We are assuming it was uploaded to user kit 8 (US.08) via Wooveconnect.
Auto-slice with full playthrough

We start off with slicing the one master sample into multiple (sixteen in this case) evenly spaced slices. The goal is to be able to trigger these bits of the master sample at will.
Your Woovebox has two different auto-slicing modes. The one we will be using for chopping the Amen break, is "even slicing" ('EvEn' in the context menu). Notably we will be using the "full playthrough" option (any of the sub-options that end in '>>'). This will chop up the chosen (e.g. slow-blinking) slice (in this case our master sample) into a specified number of evenly spaced slices, which all play through to the end of the master sample. This is in contrast to the regular (non '>>' options), which just play slices up until where the next slice starts. You can of course always change the start and end-points of your slices manually if you so wish.

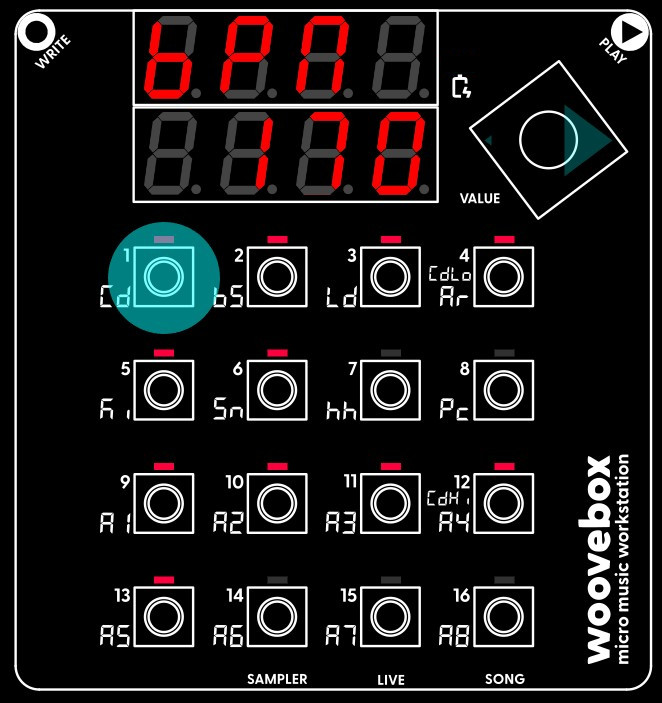
Now go ahead and action the 'EvEn' option and its '16>>' sub-option in the context menu.
Set ping-pong mode

Multi-select all slices (e.g. hold one slice until it fast-blinks, then hold write and let go of the slice you were holding, now - still holding write - select all 16 slices until they all fast-blink).
Still holding write, press the value knob repeatedly to select the 'ModE' parameter. Turn the value knob to set it to 'PinG'. This mode ("ping pong" mode) plays a slice to the end, and then starts playing the slice in reverse until it is back to the start of the slice. It then starts playing forward again, and so on, and so forth.
Combined with each slice playing until the end of the master sample, and playing backwards and forwards continuously, means that you will never run out of audio for the duration of the note/step you program. It will furthermore play fragments of the master sample in reverse, which can add to the sonic complexity of your new break.
Of course, if you wish to deliberately run out of audio, you can use a different slicing mode and/or turn off "ping pong" mode.
Finally, note that instead of multi-selecting and setting all resulting slices to 'PinG', we could have also just set our single master sample's mode to 'PinG' before auto-slicing it instead; auto-sliced slices inherit the mode parameter from the original slice.
Set constant length warp mode

Multi-select all slices and set the "WarP" parameter to "Ln.C.M".
This mode ensures slice time is automatically varied so that it perfectly stretches the playback over the duration of the step length("Ln") as determined by your song's BPM, and keeps the pitch constant ("C"). The difference from the "Ln.C.S" mode, is that the slice's playback speed is scaled in proportion to (e.g. in context of) the full master ("M") sample length.
Try auditioning the slices after you have set their "WarP" parameter. If your auditioning length (hold write + turn value knob) is still set to 1 (default), you should hear short bursts as the slices are "crammed into" one step's worth of time.
Instead of hearing a fast burst, set the auditioning length to 16 (e.g. one bar, which is the actual length of the Amen drumloop we uploaded) however, and you will hear the drumloop play at a more normal speed.
Set the auditioning length to 32 and you should hear the drumloop play at half the speed (e.g. the sample is stretched over 32 steps at your chosen song BPM). You will also start hearing the quintessential "metallic" artifacts that the oldschool samplers were known and - depending on who you ask - celebrated for. Many Jungle and Drum and Bass tracks rely on these artifacts to impart further interest and energy on their breaks. As you will see, you can summon these artifacts on demand once it is time to build you new break in the sequencer.
As a side note, it is worth mentioning that you can also use the "Ln.V.M" mode, which does not apply the pitch correction at all and instead modifies the pitch of the sample to accommodate the time it needs to cover. This would have been the go-to technique to sync non-sliced sampled drumloops with different BPMs before time stretching was available. You can find this behavior in earlier Jungle tracks.
You can verify your sample kit is synced to your Song's BPM by leaving the sampler, setting your song's BPM, and returning to the sampler again to audition the slices in your kit once more. You will notice your slices will have sped up or slowed down according to the change in your song's BPM.
Create and apply sample kit patch
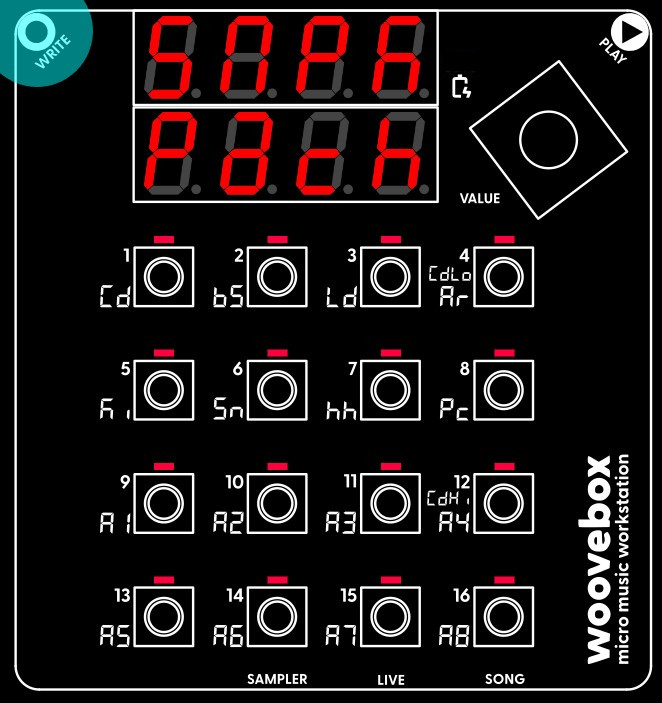
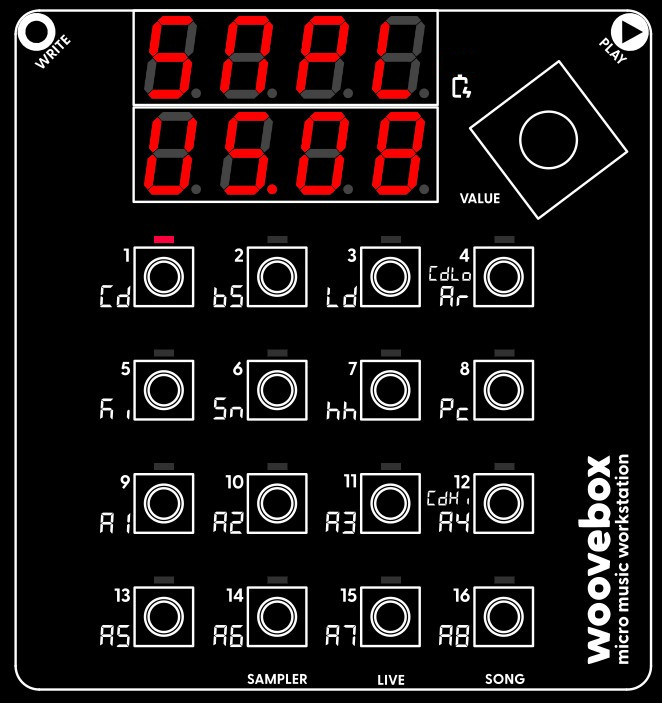
Creating a patch out of your sample kit for applying to a track is very easy. Select and action the "make sample kit patch" functionality ("Pach Kit") from the context menu. This creates a patch and puts it into the patch buffer (the same buffer that is used to copy and paste patches between tracks and songs).
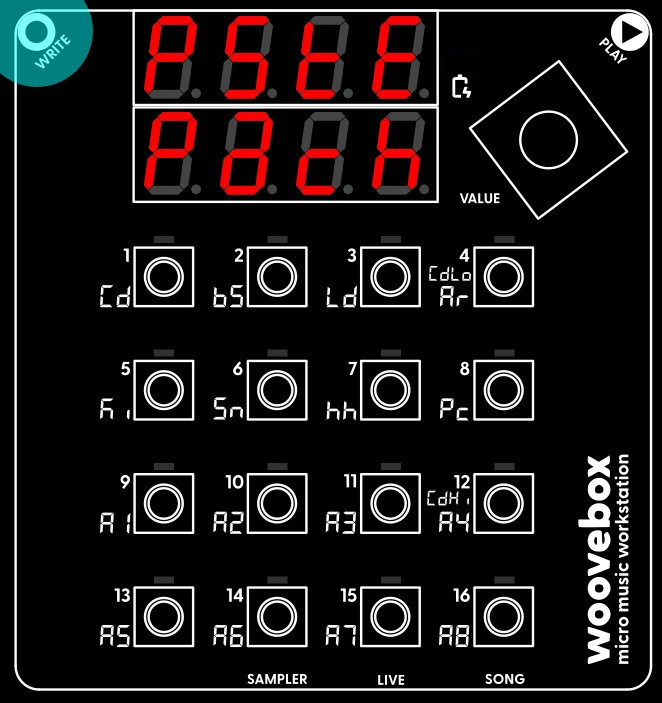
To apply it, switch to the track you wish to have your brand new sample kit on. For your convenience, the track will already scroll to the "Pach" page. From here, simply select and action the "paste patch" ("PStE Pach") function from the context menu. Your kit is now ready to be used.
Program a break
You can now program slices one through sixteen on the track's steps. Notice how note length dictates the speed with which the sample plays through, with - in our case of the Amen break - 16 being normal speed (just like the auditioning length in the Sampler).
Program a few slices on a couple of different steps, always using note length 16 to achieve a BMP-synced playback. Notice you can use a step's Pich to pitch shift the slice (still keeping the playback time constant). Large pitch shifts create the metallic artifacts that early samplers were known for, and that Junglists used to great creative effect.
Furthermore, you are strongly encouraged to further refine the patch and exploit the real-time nature of the "Warp" algorithm for greater dynamic effects and sound design; for example, the nature of the "metallic" artifacts can be changed dynamically by modifying the amplitude of Osc2 by means of its LFO. For a quick demonstration, on the amplitude (AMPL) page, program a saw wave LFO. Set 13/A5/L.2.Wv to "SaW", depth (14/A6/L.2.dE) to 64 and rate (15/A7/L.2.rt) to 6 steps. Letting the LFO run free (rather than retriggering) further help create interest. For more information see the time and pitch warping documentation.
In general, coming up with a compelling break is surprisingly easy on the Woovebox, thanks to its conditional triggering as well as automated muting generator. A single 16-step pattern can be all it takes for a complex, energetic break that plays out over many bars.
This is a very quick example of some ingredients that might go into such a break;
- To start, set note length (hold write + turn value knob) to 16 steps. Now play/select the first slice (which should be the entirety of the drumloop) and put it on step 1. As a side note, notice what happens when you change the step's pitch; the pitch of the drumloop changes without impacting the speed with which it plays back.
- Grab (audition) slice 13 and program it on, for example, step 11. Due to the way we auto-sliced (16 even slices), this - in effect - starts playing the sample's 13th step early on the 11th step. Once the sample runs out, you should hear it "ping pong" in reverse for the last 2 steps to make up for the missing audio. As a side note, you will notice that - again because of the way we auto-sliced (16 even slices) - if you grab a slice number and put it on that same step, you restore the original flow of the drumloop.
- Create a conditional on the first step we programmed; on the fourth playthrough ("WhEn Pth4"), perform a "2 note up" ("do UP2n") command.
- Grab slice 5 and program it on step 16. Give it, for example, a x3 repeat/"ratchet" conditional ("do ][ 3") with a probability of 25%.
- Grab slice 7 and program it onto "itself" (step 7), allowing us to conditionally modify it every 8th playthrough ("WhEn Pth8") and perform a "2 note up" ("do UP2n") command.
- Grab slice 13 and program it onto "itself" (step 13), and program a tape stop effect that only gets triggered every 16th playthrough ("WhEn Pt16.").
And so on, and so forth. You should end up with the break from the example. For extra mayhem, you can use the pattern muting functionality, which will allow for certain slices to never trigger/take over, therefore allowing other slices to play out longer. You can also change the song's BPM and the break will still sound largely the same.
To see a more standard Amen chop being reconstructed in real-time from its source material, you can also have a look at the "Good Ol' Days" demo track .SYX in the resources section.
You may also be interested in...
- "Knight Rider" (1982) (remake) song SYX (under Example songs and patches .SYX files)
A track showing how a complex song that famously features equal parts vintage synth and real-world instruments, can be recreated in the Woovebox.
- 12. Au.Ho Auto-Pan LFO Hold (under Panning page)
Specifies the hold time for the auto-pan LFO in milliseconds.
- Song mode (under Guides, tutorials and docs)
Song mode on the Woovebox is so powerful in fact, that even a single pattern per track is enough material to create a complex song with.
- 9. ch.SP Chorus Speed (under EFct (global song-wide multi-effects) page)
Speed by which chorus effects unit bounces between chorus time 1 ("ch.t1") and chorus time 2 ("ch.t1").
- 12. ch.AL Chorus Algorithm (under EFct (global song-wide multi-effects) page)
- Sampler & vocoder
- Adding samples via Wooveconnect
- Levels, VU Metering & monitoring
- Sampling sounds from the audio input
- Skip-back sampling (resampling)
- Vocoder
- Working with slices
- Auto-slicing
- Real-time pitch and time warping
- Amen chop tutorial
- Multi-sampled instruments and percussion
- Using the two sample banks
- Using samples and kits in your songs
- Using single-cycle AKWF samples
- Using Amiga Tracker samples
- Using Teenage Engineering OP-1 / OP-Z sample kits
- Kit and/or master sample initialization
- Backing up sample kits
- Auto-space reclaimer
- Limitations