- Sampler & vocoder
- Adding samples via Wooveconnect
- Levels, VU Metering & monitoring
- Sampling sounds from the audio input
- Skip-back sampling (resampling)
- Vocoder
- Working with slices
- Auto-slicing
- Real-time pitch and time warping
- Amen chop tutorial
- Multi-sampled instruments and percussion
- Using the two sample banks
- Using samples and kits in your songs
- Using single-cycle AKWF samples
- Using Amiga Tracker samples
- Using Teenage Engineering OP-1 / OP-Z sample kits
- Kit and/or master sample initialization
- Backing up sample kits
- Auto-space reclaimer
- Limitations
- Sampler & vocoder
- Sampling sounds from the audio input
Sampling sounds from the audio input
Hold the value knob and short-press 14/A6/Sampler button to access the sampler. If needed, repeat this until you are in sampler ("SMPL") mode and not, for example, in vocoder mode ("VCdr").
Select the kit you wish to edit or record samples to by holding play and pressing 1-16 to select kit 1-16.
Connect an audio source to the audio input of your Woovebox and set the appropriate audio source and encoding by turning the value knob. You may select the from following options;
- '22.16 line'; records line-level audio at 22.05kHz 16-bit. Use this option to record generic audio, as well as audio with relatively low harmonic content such as pianos, basses, basic synthesized material, or audio with long decays or releases.
- '44. 8 line'; records line-level audio at 44.1kHz 8-bit mu-law. Use this option to record "busy" audio with relatively high harmonic content, such as acoustic drums, drumloops and voice. This option emulates the vintage E-mu Emulator II sampler.
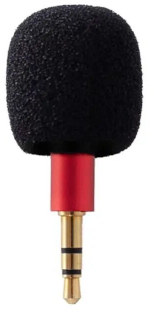
- 'Mic 24db'; records mic-level audio with 24db gain at 22.05kHz 16-bit. Use this option to record voice from an unamplified microphone, for example as included with the Woovebox Pro.
If desired, press the play button to monitor the input (see VU metering). Press play once more to turn off monitoring.
To record a sample, hold write and press 1-16 where you wish to record the sample to. Hold 1-16 for as long as you wish to record.
If you wish to play your sample chromatically (e.g. non just for percussion or one-shot purposes), samples should ideally be recorded as an A-note. In other words, if you wish to sample another instrument, have it play an A. However, if the material is pitched differently by a number of semitones, you can adjust the root note using a slice's pitch (Pich) parameter so that it sounds like an A.
Any recorded audio is automatically normalized (e.g. dynamic range is optimized).
Please note that any uploads or changes are committed only once you switch away from the sampler or to another sampler mode. Until that time, you can completely undo all changes made through the "Undo" in the context menu, which will restore the state of the sampler as it was before you entered it.
Using a mic; recording line level vs mic level
Ideally, the audio source should output "line level" (a smartphone, table, laptop, keyboard, the audio output of any other synthesizer gear, etc.). However, if you are in a pinch and need to record voice for further processing or wish to use the vocoder, your Woovebox can also record faint "mic level" signals as produced by unamplified microphones directly plugged into the input.
To record mic level, in the sampler turn the value knob right (for mic level) or left (for line level - default). Please note that trying to record faint mic level signals without switching the input to mic level ("Mic 24db"), will result in interference being audible in your recording.
Mic level signal amplification and filtering is performed in the digital domain; a custom-designed digital filtering algorithm removes the interference after recording a slice. As a result, a short pause (dependent on the length of the sample) occurs after recording the sample ("wait"). You will also notice all LEDs turn off during recording of mic-level sources; all unnecessary sub-systems are powered down to minimize noise and interference.
Sampling mic-level input is mostly meant for getting voice recording/input on the device for further processing (for example via the vocoder, or using the voice recordings as material for pitch and time warping). You may find it less suited to recording ambient or non-voice sounds. A fixed 300Hz - 8000Hz bandpass filter is in place to remove non-voice related frequencies and rumble.
You will typically find it is necessary to speak closely to the mic, almost touching the pop shield - much like a pro-singer of voiceover artist - to get the cleanest possible recording. The less the signal has to be amplified, the less noise will be present in the recording.
Lastly, make sure your chosen mic is able (or TRS fixed-wired) to provide a stereo signal (e.g. has its signal on both the Tip and Ring). Other signal configurations will not work.
You may also be interested in...
- "What Is Love" (remake) song SYX (under Example songs and patches .SYX files)
The track makes liberal use of overlapping notes + legato for the voice line approximations.
- 2nd octave (under Mapping)
- Guides, tutorials and docs (under Support, guides & tutorials)
Get to know your Woovebox and music production, from beginner to expert level.
- Tempo and BPM (under Guides, tutorials and docs)
This makes your songs sound like well-planned, evolving pieces of music.
- Turning off Wooveconnect CC messages (under MIDI, Sync and connecting other gear)
Device mirroring is off by default, if the device was not booted up with BLE enabled.
- Sampler & vocoder
- Adding samples via Wooveconnect
- Levels, VU Metering & monitoring
- Sampling sounds from the audio input
- Skip-back sampling (resampling)
- Vocoder
- Working with slices
- Auto-slicing
- Real-time pitch and time warping
- Amen chop tutorial
- Multi-sampled instruments and percussion
- Using the two sample banks
- Using samples and kits in your songs
- Using single-cycle AKWF samples
- Using Amiga Tracker samples
- Using Teenage Engineering OP-1 / OP-Z sample kits
- Kit and/or master sample initialization
- Backing up sample kits
- Auto-space reclaimer
- Limitations